Preparing a Detailed Sales Quote
Article Summary
This article explains how to do a Detailed Sales Quote, under the Detailed Entry Menu.
As a reminder, the Detailed Entry screen
brings the Desktop transaction entry screen "experience" into a Cloud/Web
browser interface. Users who need the full power (or who are used to a Desktop
interface) will welcome this functionality and find it familiar.
You can
also easily "Save" any transaction before posting to the Business System AND the Detailed Entry allows for Sales Credits to be created.

Note: If there is no Detailed Entry option available to you, please contact Support@PlusSoftSolutions.com for assistance.
Reminder:
- You can also use the Quick Entry menu option (menu above) if you prefer.
- The Quick Entry option is often used for quick, "in front of Customer" transactions. It does not offer the option of Sales Credits.
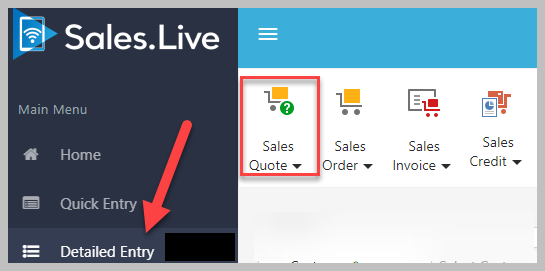
Processing a Detailed Sales Quote
Once you've clicked on Detailed Entry a transaction screen opens:
You can now complete:
- A Sales Quote;
- Or a Sales Order;
- Or a Sales Invoice;
- Or Sales Credit.
The Detailed Entry screen is easy to follow.
Start by entering information into the fields and choose the Sales Quote option when ready.
Start by entering information into the fields and choose the Sales Quote option when ready.
1. First, choose Customer:
Type in the name of the Customer (enter the first few letters and a list of Customer names will appear) and enter information into the fields displayed.
Some information may be automatically selected - in that case press the Tab button to move to the next field.
Note: A Sales Rep and Warehouse needs to be selected or you'll be unable to progress.
2. Now choose Inventory:
- Hit New (top left of Lines Box) and begin adding Inventory Lines in the Sales Quote Inventory Screen, again filling in relevant fields;
- To add a new Line, hit Insert New Line tab, at the top of the screen;
3. Click on the Sales Quote Icon and either "Push" or "Save":
a) Push to Business System:
This pushes the Sales Quote to the Business System.
You will see a green notification, on the top right "Success. The transaction has been added."Note: Depending on the Business System, there may be further steps required to accept the Sales Quote into the Business System.b) Save to Sales. Live:
This keeps the Sales Quote information within the Sales.Live mobile platform environment.
Once you click on "Save to Sales.Live", you will see a green notification, on the top right "Success. The transaction has been added."A new screen automatically opens , with some Ribbon bar options:
Each Ribbon bar icon should be self-explanatory.Choose the functionality you want and "Save Changes" or "Push to Business System" when ready.
Note: The Undo Transaction Line Changes icon will delete all lines. Use carefully!

Related Articles
Preparing a Detailed Sales Order
Article Summary This article explains how to do a Detailed Sales Order, under the Detailed Entry Menu. The Detailed Entry screen brings the Desktop transaction entry screen "experience" into a Cloud/Web browser interface. Users who need the full ...Preparing a Detailed Sales Credit
Article Summary This article explains how to do a Detailed Sales Credit, under the Detailed Entry Menu. Warning: If Sales Credit Icon is visible, this functionality may not have been authorised. Speak to your Sales.Live administrator or see under ...Preparing a Detailed Sales Invoice
Article Summary This article explains how to do a Detailed Sales Invoice, under the Detailed Entry Menu. As a reminder, the Detailed Entry screen brings the Desktop transaction entry screen "experience" into a Cloud/Web browser interface. Users who ...2. Connect Business System to Sales.Live
Once you've set up the Company Portal and First User, you need to connect your Business System (ABM, MYOB, SAGE etc) to Sales.Live. This connection is via something we call a Data Connector. This allows the sharing of information between your ...The Sales Quotes Menu & Details Tab
Article Summary We explain here how to use the Sales Quotes option, which shows all Quotes which have been posted from Sales .Live. Sales Quotes screen When you first open this screen it will show the quotes which were posted in the previous 2 weeks. ...